

How To Draw A Chair With A Table
The table is a piece of furniture with a flat top and one or more legs. It provides a apartment surface where you can identify a multifariousness of objects.
It tin also be used for many purposes, such as eating, writing, studying, or playing games. Thus, a table is definitely an essential piece of furniture in our dwelling.
Nosotros have created a step-by-step tutorial on how to draw a tabular array, summed up in 9 quick and easy steps.
In one case y'all acquire how to draw a table, yous can contain it into much more than complex drawings.
Possibly yous can draw a human beingness eating dinner on a table while sitting on a chair next or perhaps a kid playing reckoner games on a table? The possibilities are endless!
Have fun cartoon a realistic 3D table!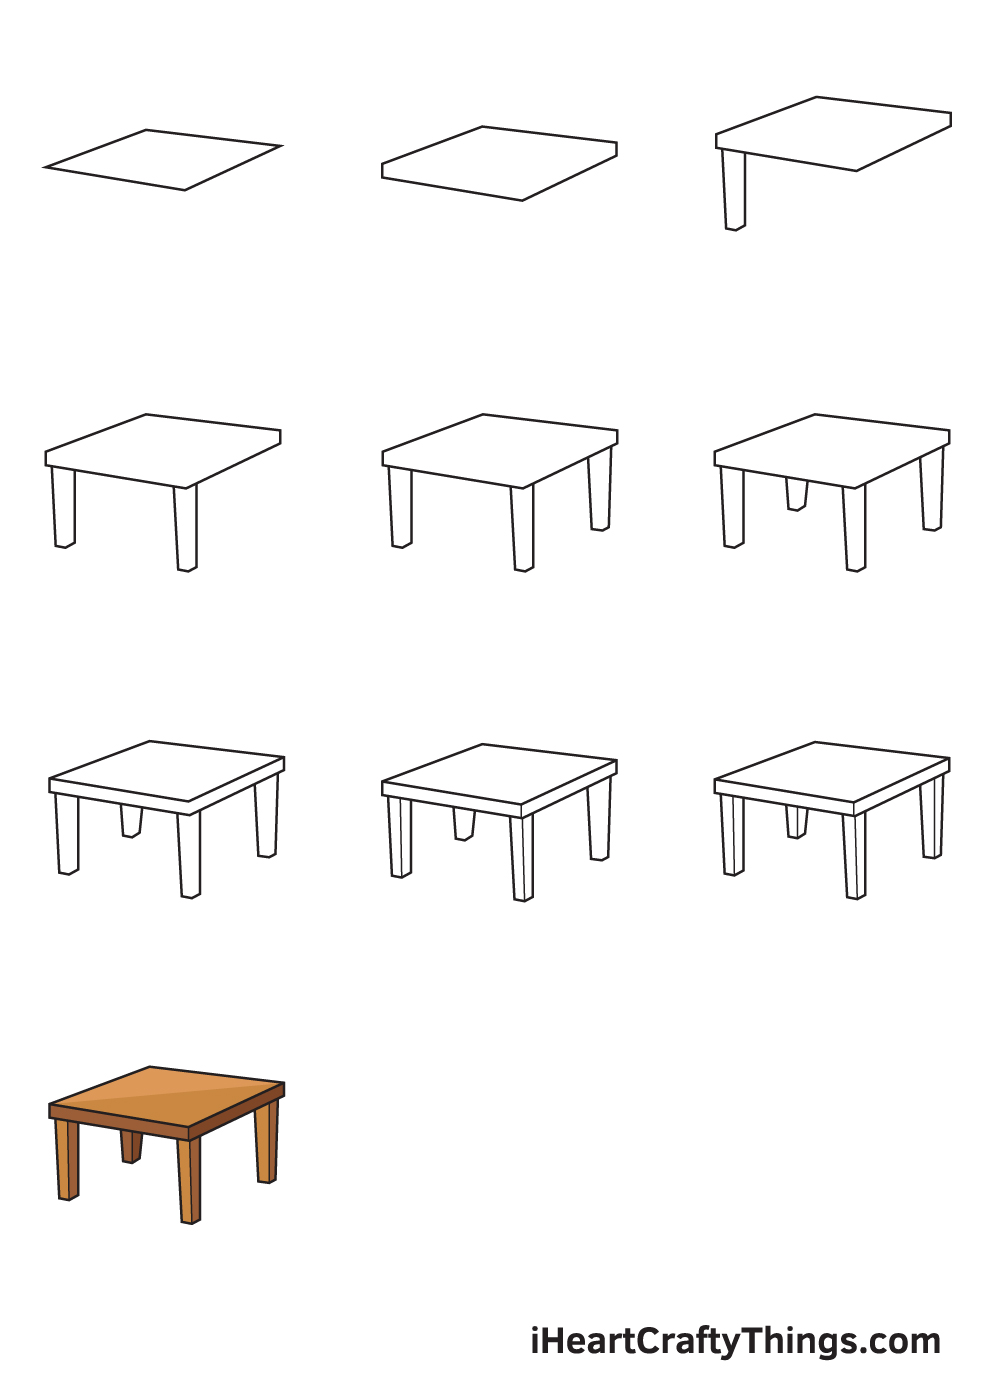
What's in this Web log Mail service
- How to Draw a Table — Let'due south go started!
- Step 1
- Step ii — Draw the Topmost Part of the Table
- Step 3 — Draw the Left Front Leg of the Table
- Step 4 — Draw the Correct Front Leg of the Table
- Step v — Depict the Correct Back Leg of the Table
- Step 6 — Complete All Four Legs of the Tabular array
- Step 7 — Draw a Line on the Top of the Table
- Step viii — Add together Dimensions on the Front Legs
- Stride nine — Finish the Dimensions on All Four Legs
- Your Table Drawing is Consummate!
How to Draw a Tabular array — Let's become started!
Step 1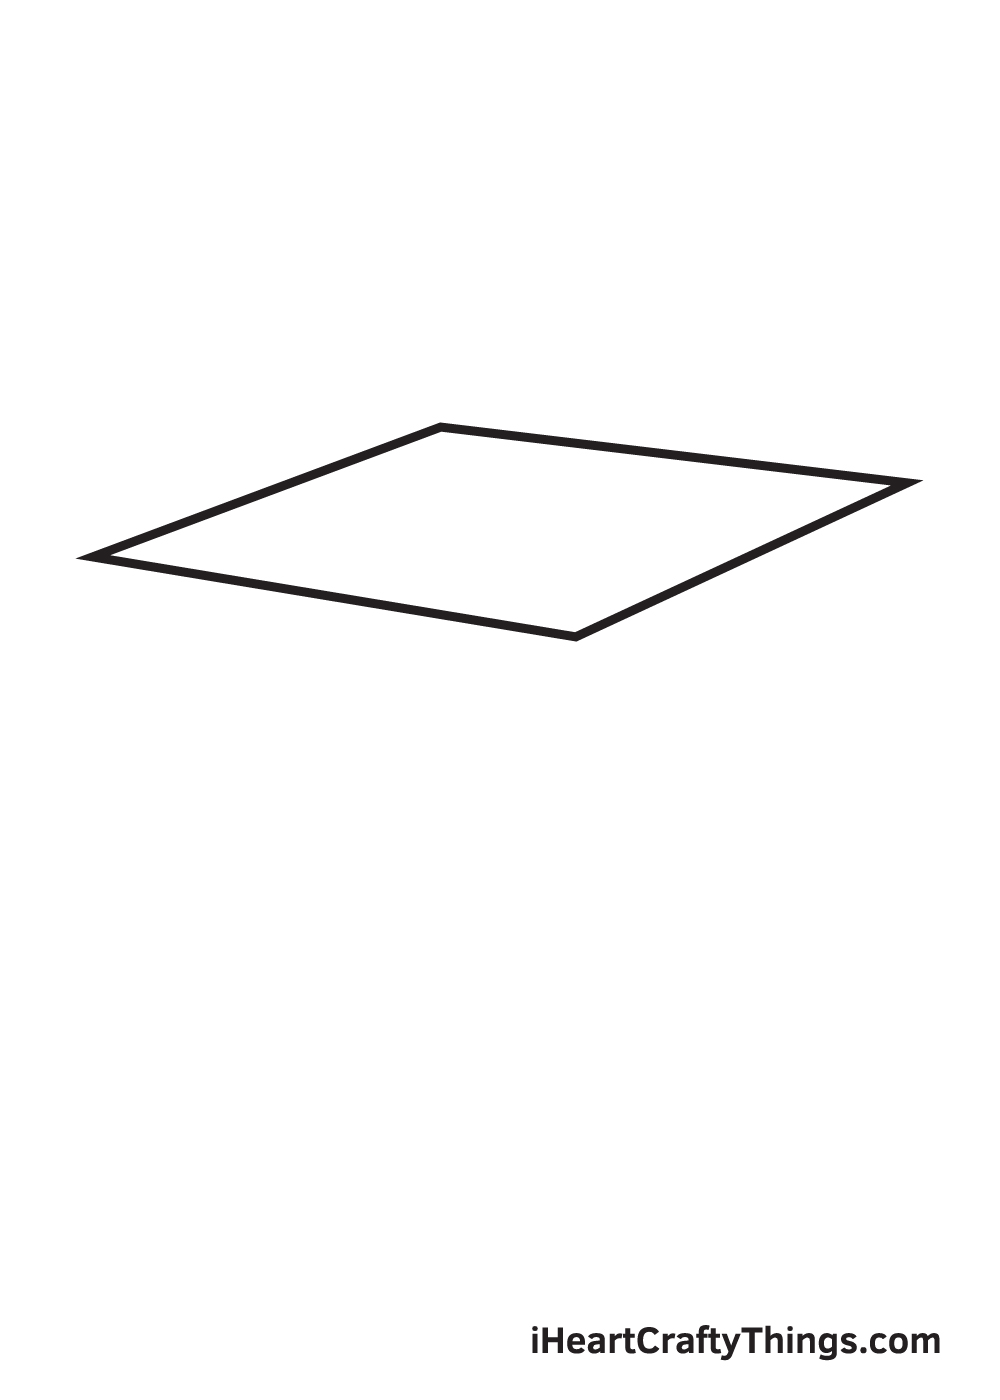
Draw a tilted parallelogram shape to create an outline of the superlative of the tabular array.
Call back, employ light strokes when drawing an outline. Avoid pressing downwards likewise hard with your pencil so yous tin can easily remove the outline when you no longer need it subsequently on.
Stride 2 — Draw the Topmost Part of the Table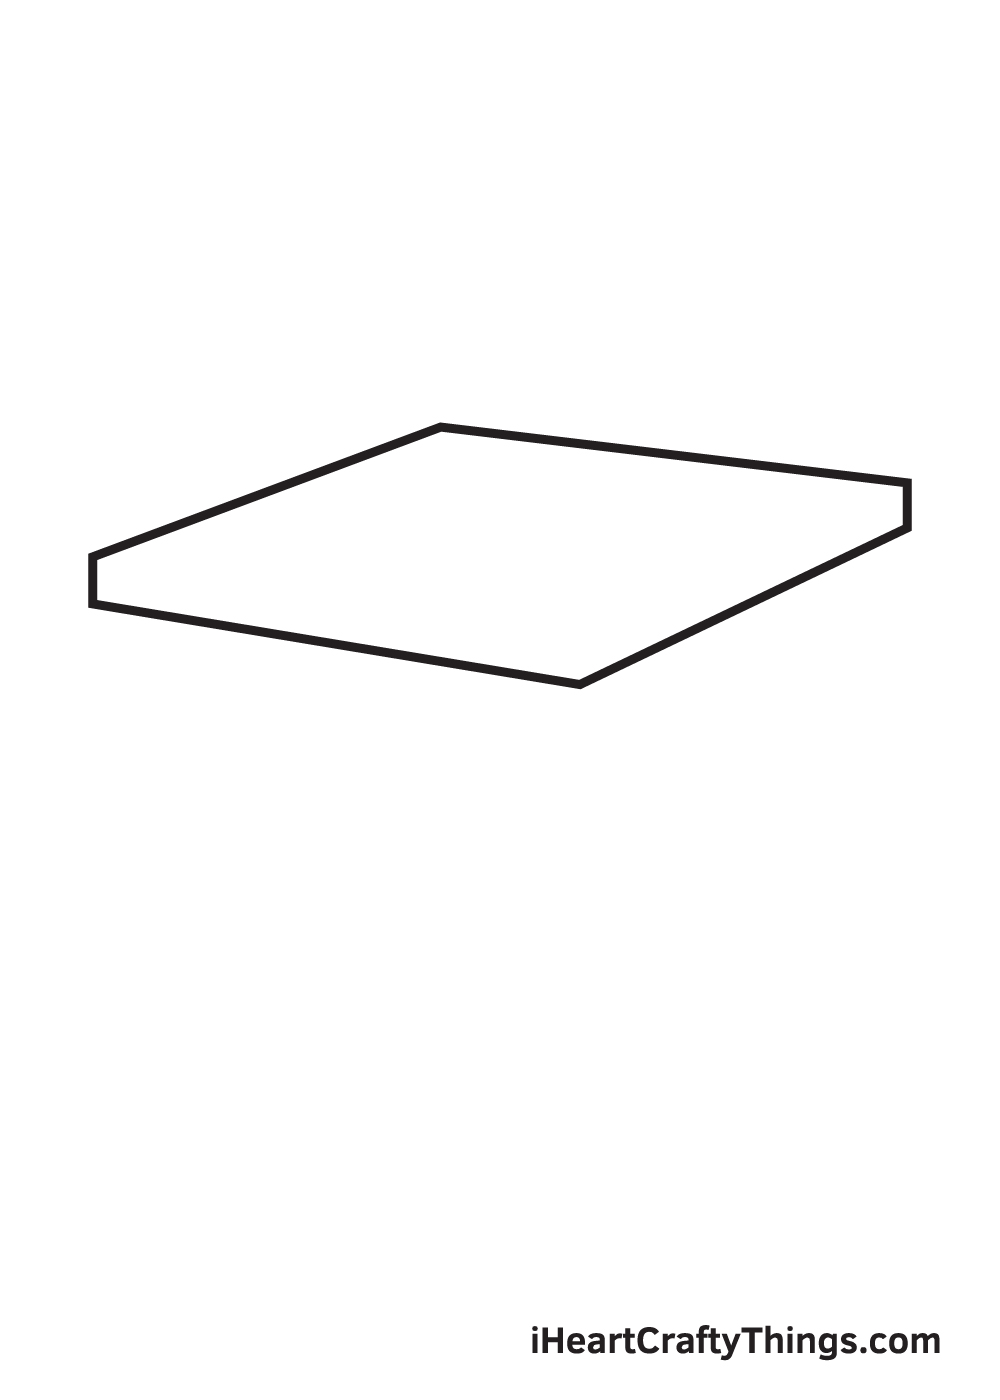
Draw a wide V-shaped line with a brusque vertical line on both sides right underneath the outline. Go along in listen that the line should be parallel to the bottom of the outline that nosotros drew in the previous stride.
Don't forget to erase the lesser part of the outline! This refines the shape of the height of the table.
Step 3 — Draw the Left Front Leg of the Table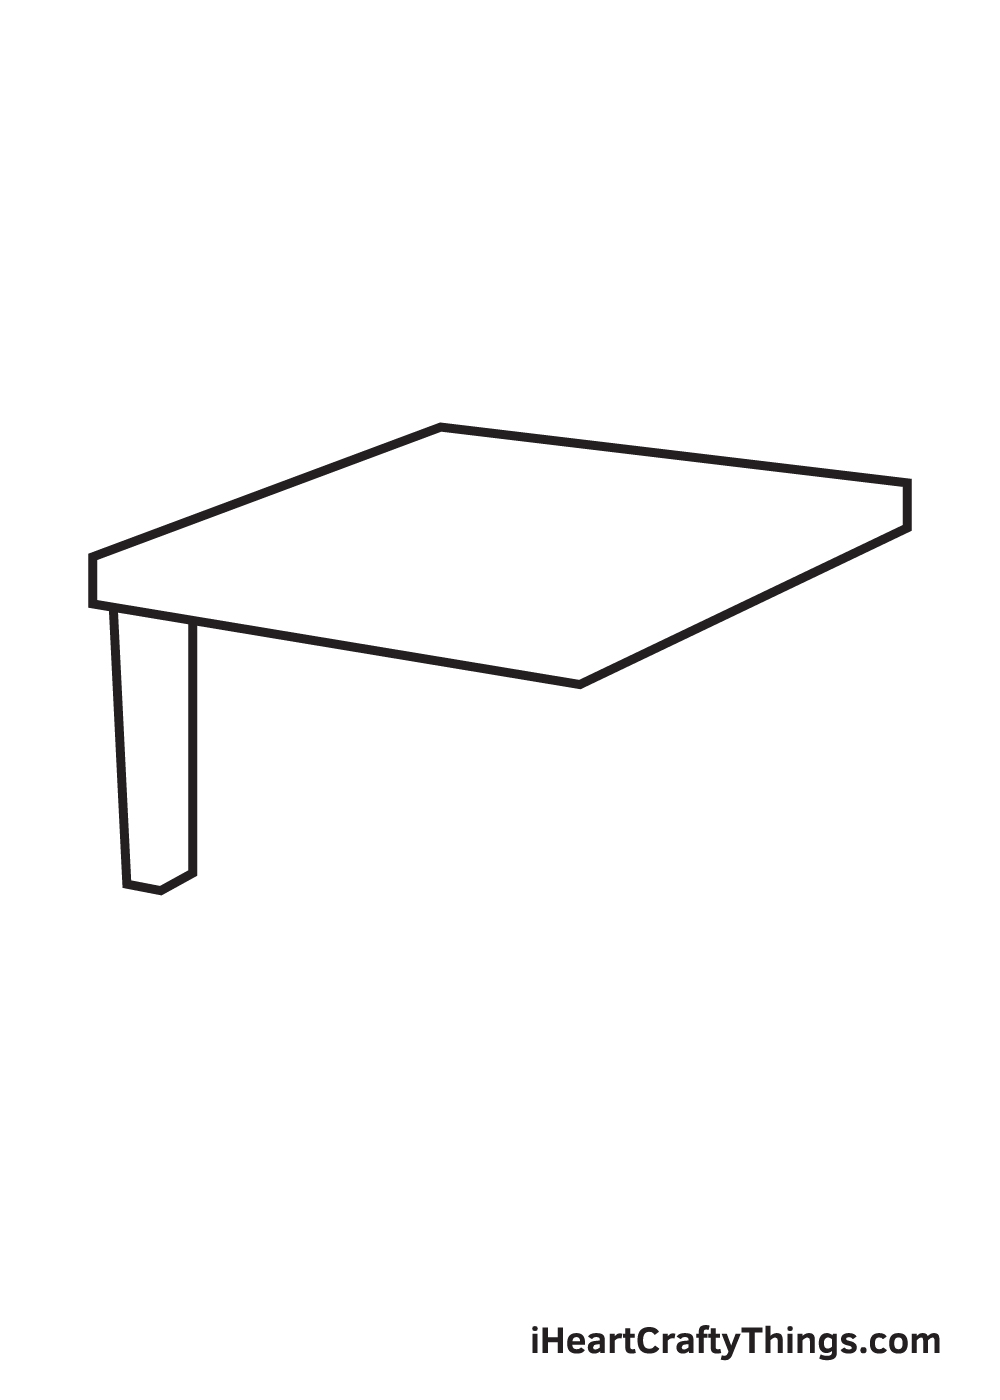
Depict an elongated, narrow effigy right underneath the front left corner of the table.
This forms the left front leg of the table.
Step 4 — Draw the Right Forepart Leg of the Table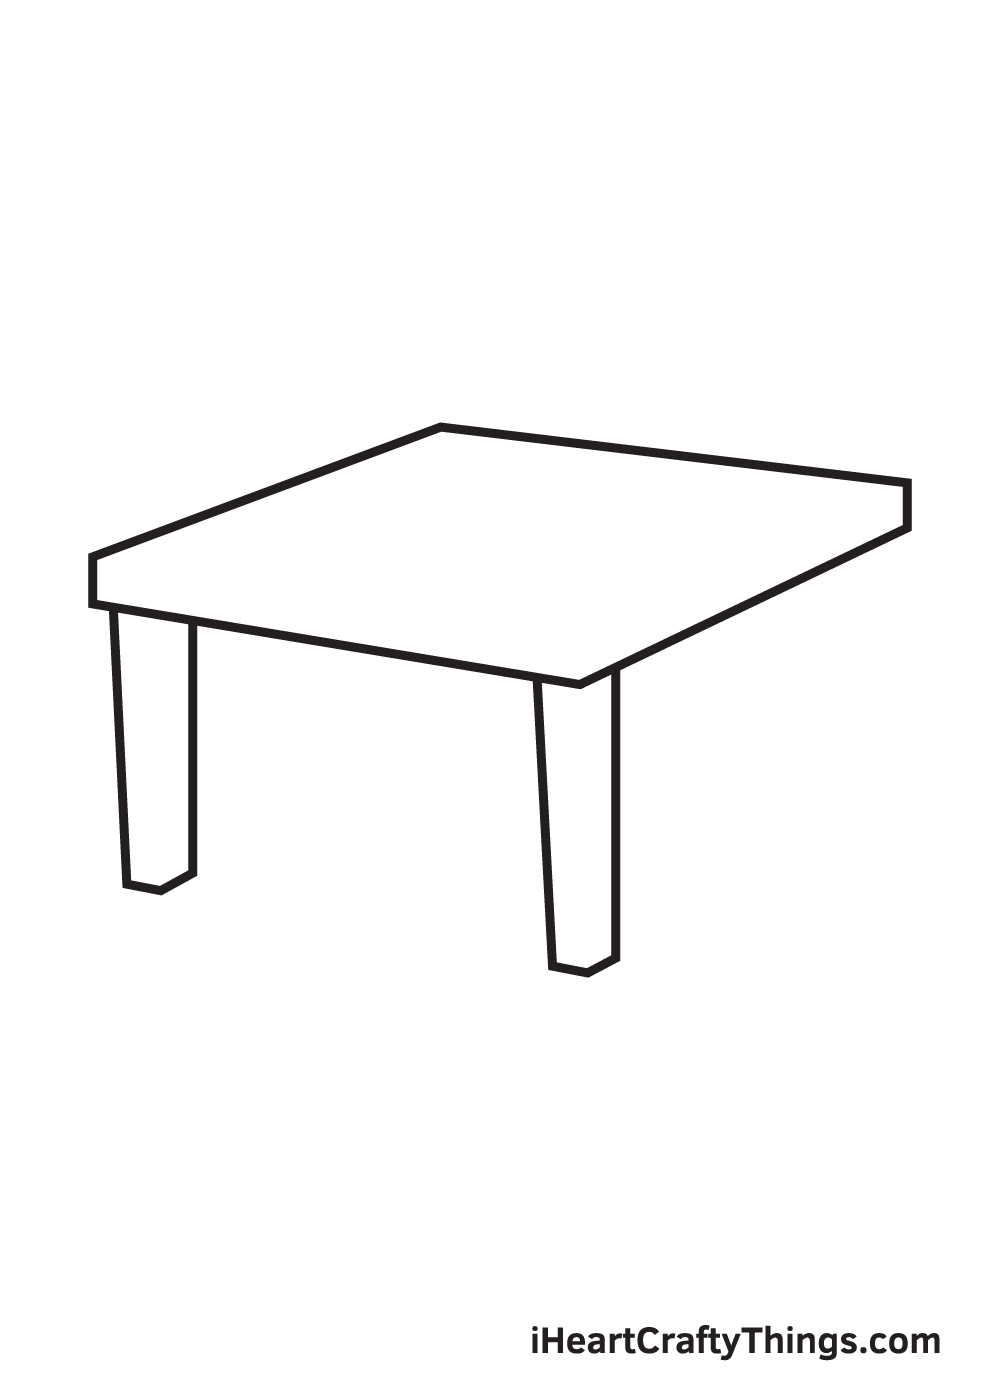
Repeat the previous step to draw another leg underneath the front right corner of the table. This forms the correct front leg of the tabular array.
Keep in mind that the forepart legs of the table should have a similar length. Nevertheless, the right front leg may appear lower than the left front leg because the table is tilted sideways.
After finishing this pace, the left and correct front legs of the table should now be consummate.
Step 5 — Describe the Correct Dorsum Leg of the Table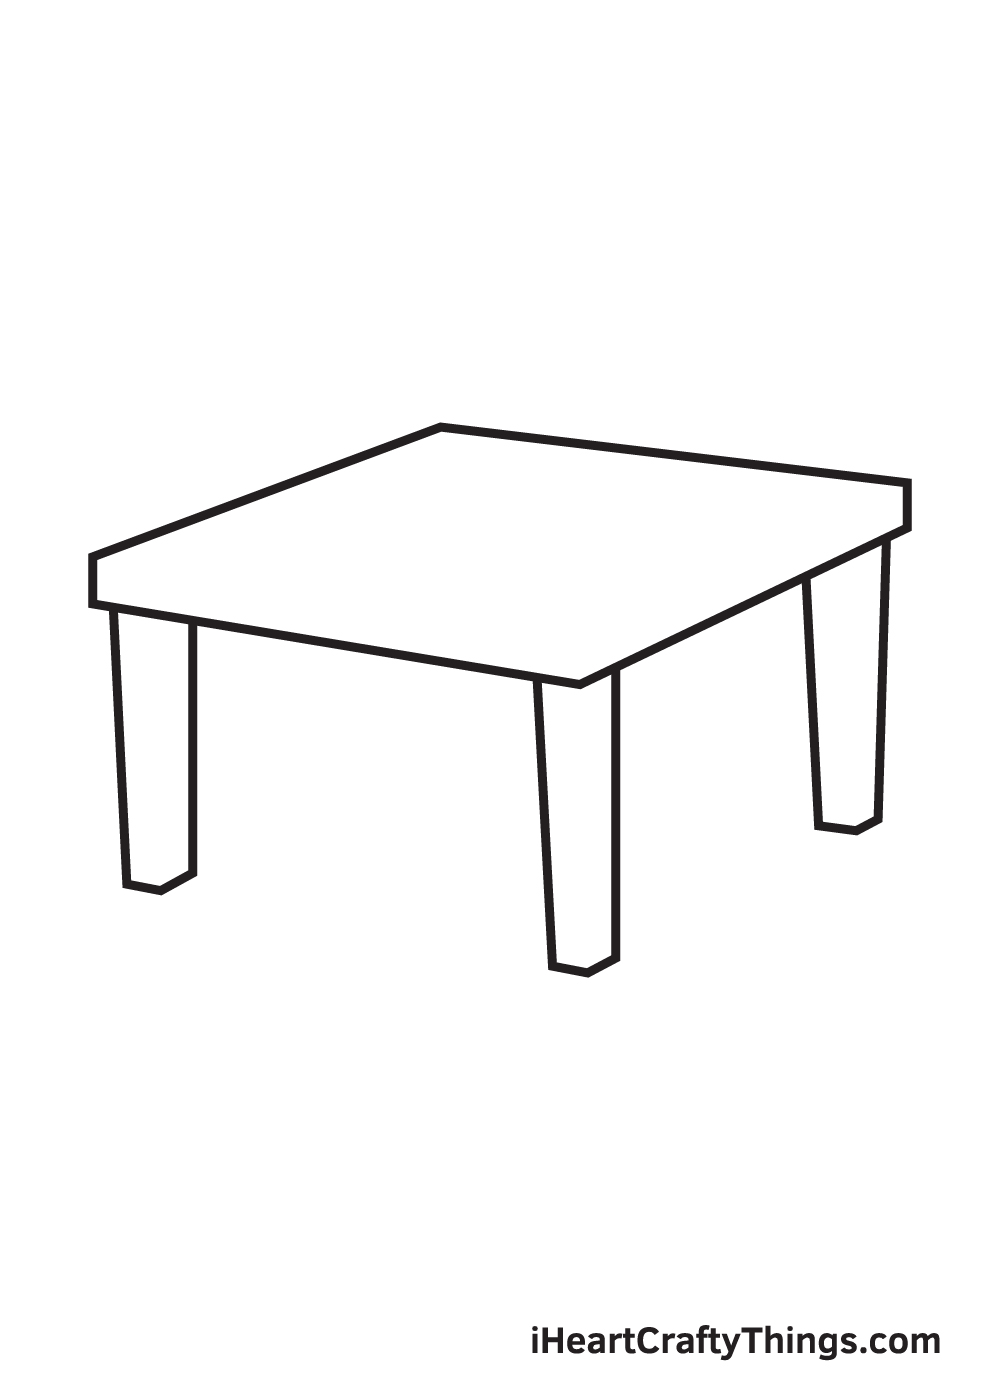
Draw another elongated, narrow figure with an angled lesser underneath the rear correct corner of the table.
This forms the right back leg of the table.
Stride six — Complete All Four Legs of the Table
Depict another leg right underneath the rear left corner of the tabular array. This forms the left dorsum leg of the table, thus completing all four legs balancing the tabular array.
As you can see in the illustration above, the left back leg is visible simply halfway through because the top of the table covers its upper office.
Step 7 — Draw a Line on the Top of the Table
Draw an outline nearly the border of the table following its shape. When drawn correctly, information technology should look like the dimensions of the edges of the table.
This makes your table expect three-dimensional and realistic!
Step 8 — Add Dimensions on the Front Legs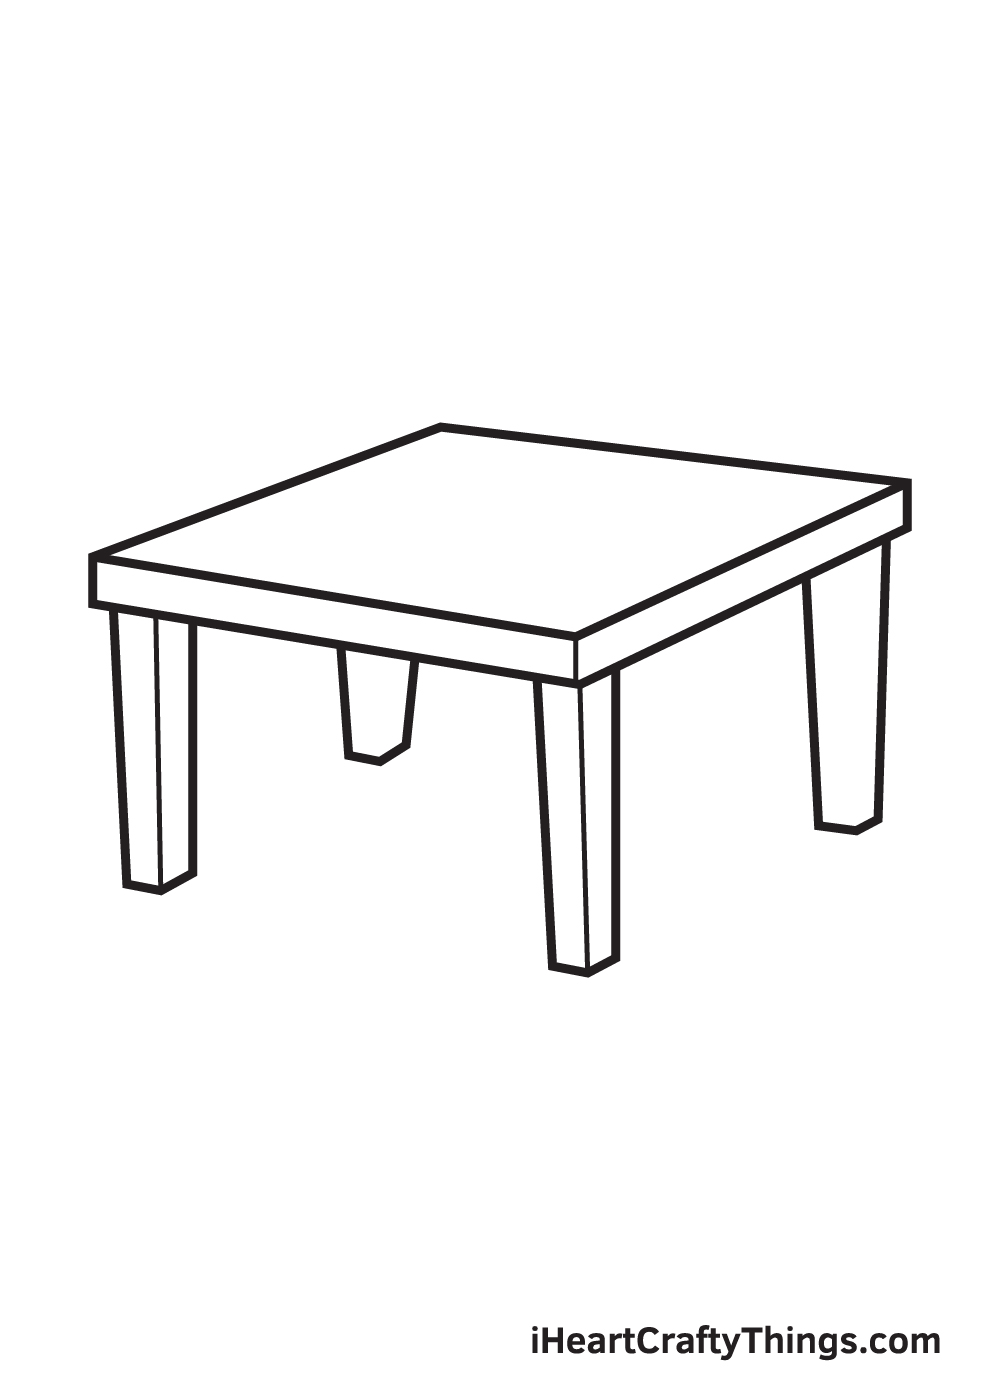
After creating the dimensions of the peak of the table, nosotros will at present be adding the dimensions of the legs.
Proceed past drawing a vertical line down the length of each front leg. This creates the edges of the legs of the tabular array. Make sure that this line is thinner than the line forming the leg itself.
Stride 9 — Cease the Dimensions on All Iv Legs
Echo the previous step on the back legs of the tabular array. At this point, all four legs of the table should accept dimensions or visible edges.
Every bit you lot can see, the tabular array has finally come together! Now, all information technology'southward missing is a nuance of colors to make the table vibrant and colorful!
Go ahead and grab your favorite coloring materials considering we're finally in the almost heady role. In this pace, nosotros'll be choosing the colors and coloring the table!
Tables come in a wide range of colors because manufacturers can paint it with nearly every color there is.
This gives yous a lot of colour options to cull from when coloring the table! Feel complimentary to utilise whatever colour you like!
You tin even use more than ane color to create a multi-colored tabular array, making information technology expect more aesthetically pleasing!
Take this opportunity to showcase your artistic skills, especially your power to mix and match diverse colors!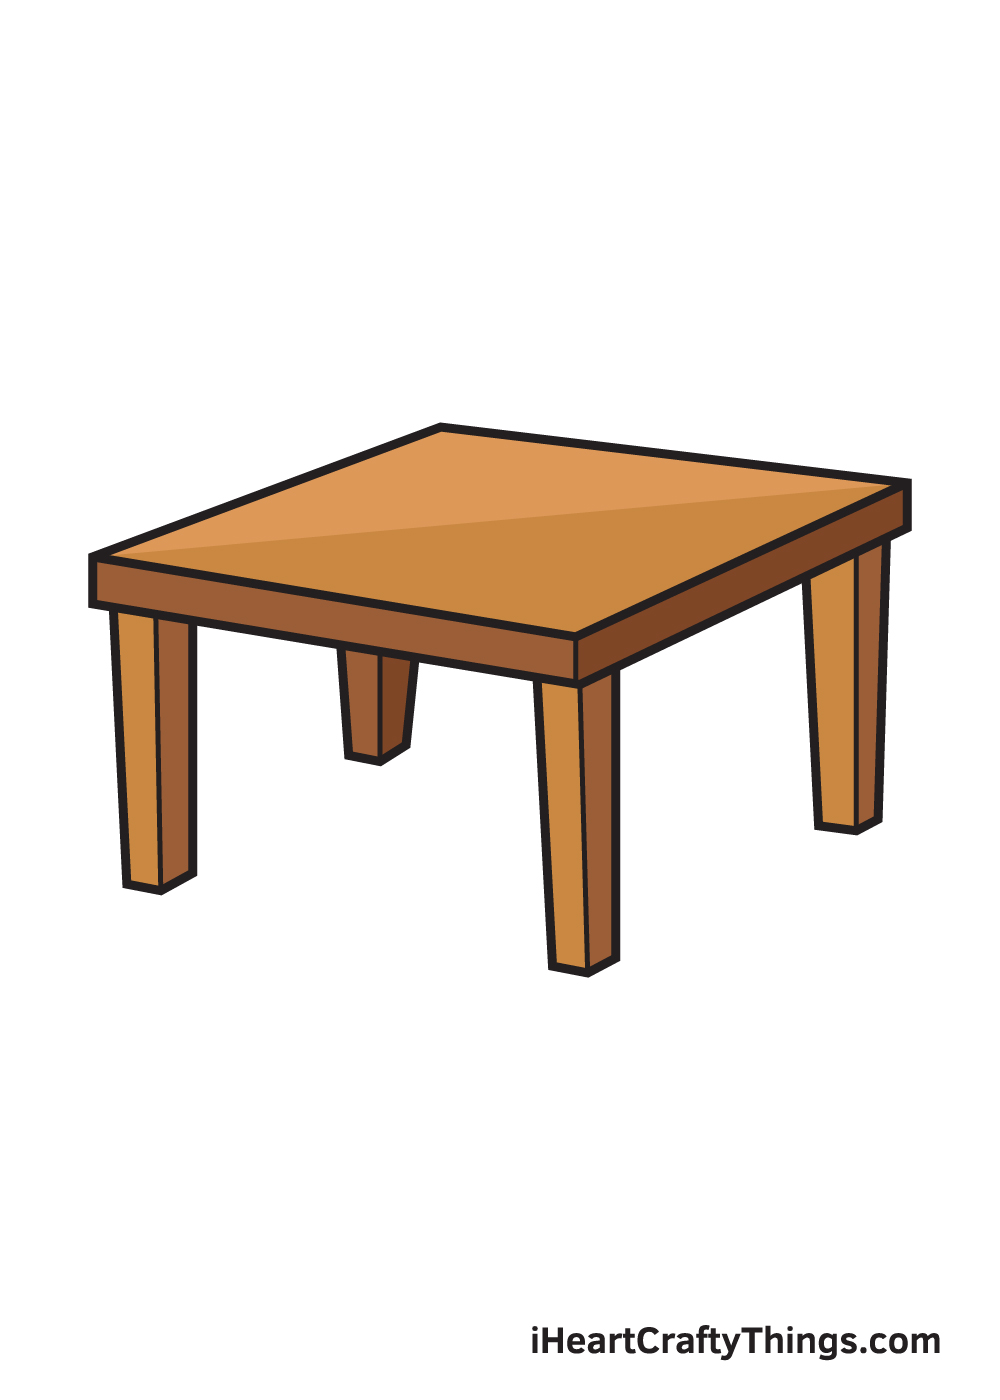
Your Table Drawing is Complete!
We hope you enjoy this pace-past-step table cartoon. If yous had fun drawing a table, perhaps you might exist interested in drawing a chair adjacent? That way, you can draw a tabular array paired with a matching chair.
Recall, all of our drawing tutorials are 100% gratuitous for y'all to apply as learning materials during your drawing activities.
We are regularly uploading content on our "How to Depict" itemize, so don't forget to keep checking back to continuously relish brand-new cartoon tutorials!
In one case you're washed drawing and coloring a table, make certain to testify off your masterpiece! Take a photo of your artwork and share it on our Facebook page and on Pinterest.
Don't be embarrassed, you've worked hard for your artwork and so we're certain it looks impressive!
We can't await to run into your realistic tabular array drawing!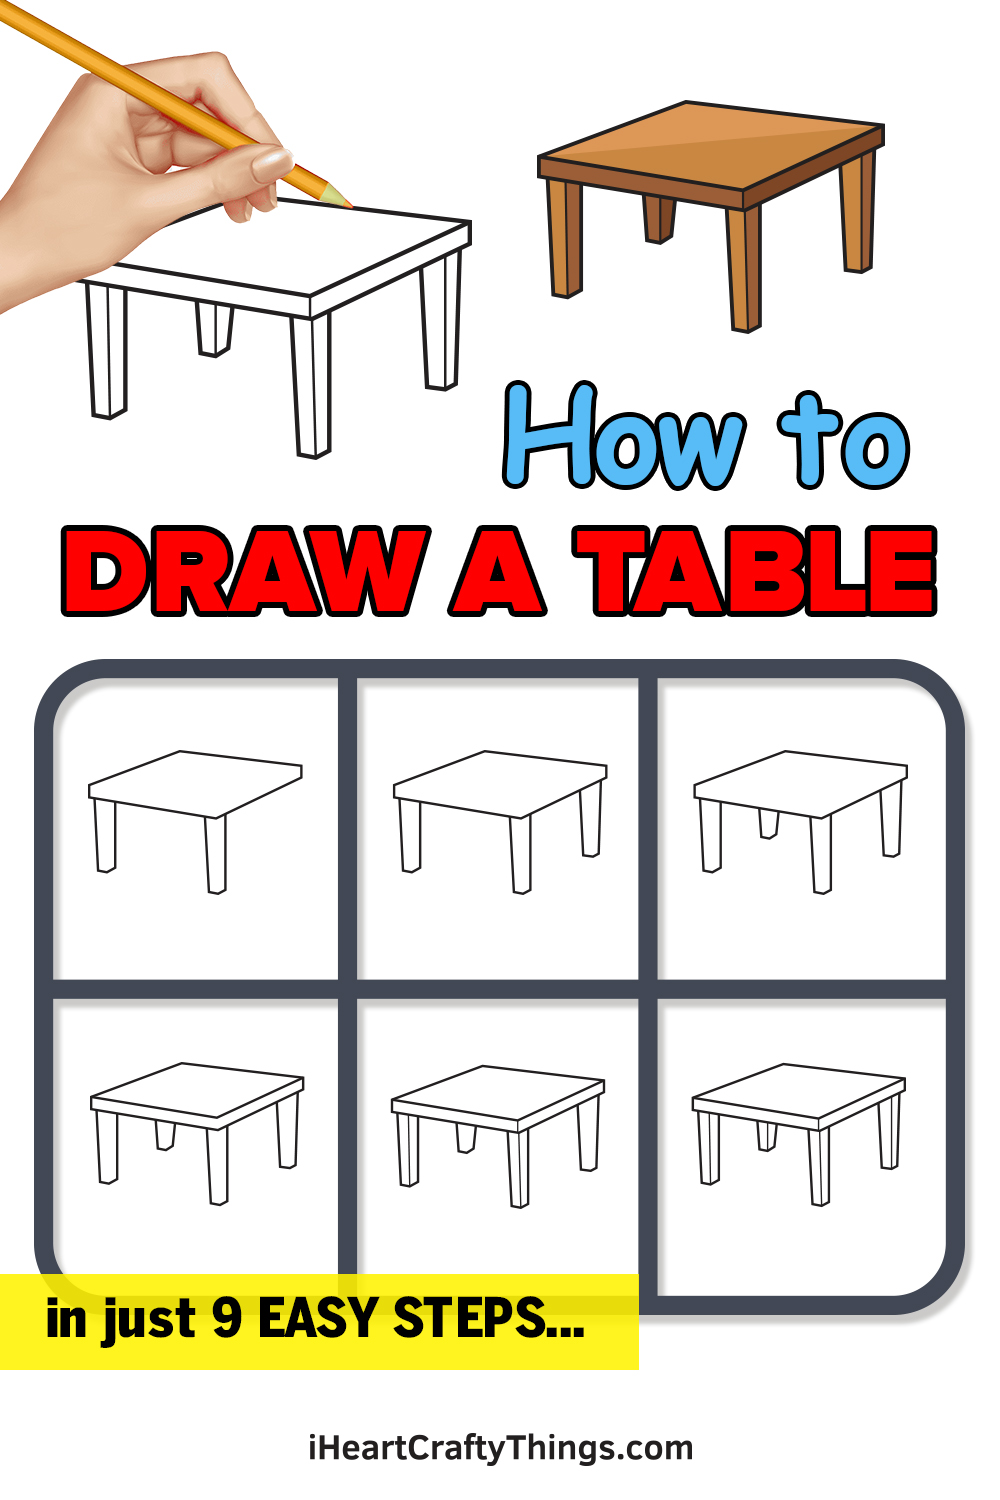

Source: https://iheartcraftythings.com/table-drawing.html
Posted by: ramirezblaideselly.blogspot.com
0 Response to "How To Draw A Chair With A Table"
Post a Comment