

How To Use A Caulking Gun Youtube
Every editorial product is independently selected, though we may be compensated or receive an affiliate commission if you buy something through our links. Ratings and prices are accurate and items are in stock as of fourth dimension of publication.
When the time comes for you to pick upwards that caulking gun and seal a shower or lay a new bead on an exterior siding seam, watch out for these aggravating pitfalls.

Anyone who owns a dwelling eventually faces the inevitable: A dried, cracked or flaky caulk seal. These can appear nearly anywhere in your abode, inside or out.
Of course, the number ane pitfall is never using caulk around your dwelling house. Caulk eventually fails and that means water getting where it shouldn't causing expensive damage) or energy loss (also expensive) because air can motion freely in and out of your home.
When the time comes for you to choice upwardly that caulking gun and seal a shower or lay a new bead on an exterior siding seam, spotter out for these aggravating pitfalls.
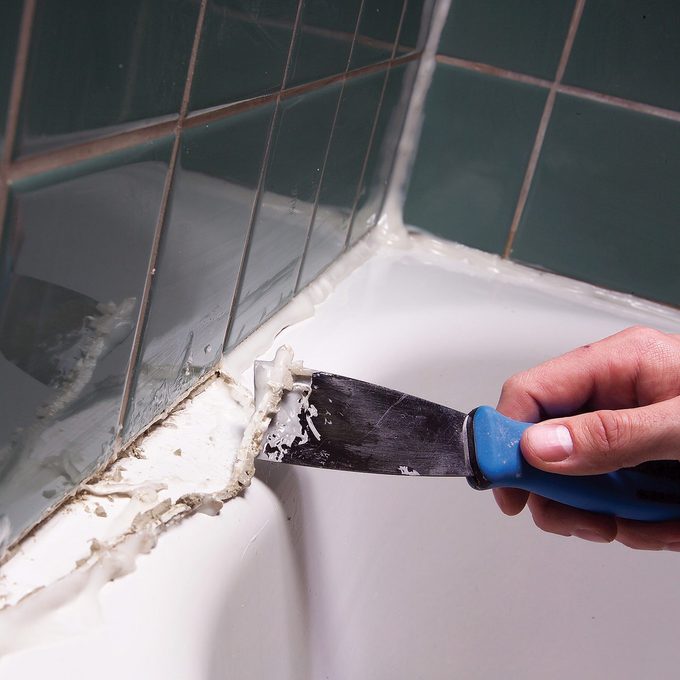
Don't Skip Prep
The first common fault happens before you lot even open the tube of caulk. Without proper surface preparation, your new caulk volition non last. As tempting as it is to quickly lay a new dewdrop and forget about it, you lot practice need to completely remove former caulk, flaking paint or aging grout; repair any surface damage and then lay the new dewdrop.

Cut Right
When you lot open up a tube of caulk, the tapered tip on each tube allows you to custom-size the opening for your specific job. Many people cutting the tip and start caulking without regard for the width of the crack they plan to seal. This results in too much fabric on the surface, poor adhesion and/or a gummy mess. Cut your tip slightly narrower than the opening and use pressure and speed to suit the width of the bead.

Heed the Gaps
When it comes to width, some other pitfall emerges—filling large gaps with caulk. Openings wider than one-quarter inch or more than one-one-half inch deep require bankroll fabric, such every bit cream rope. Pumping a huge crack full of caulk is expensive and affects product performance. Bankroll material optimizes the thickness of the dewdrop and allows for the all-time cosmetic finish.

Practice Patience
Many people charge right in, applying material immediately to the task at hand. Creating the all-time looking, most effective bead of caulk takes some skill. Instead, grab a grocery bag and practise a chip to become a feel for pressure level control and how the bead comes out of the tip. Consistency is primal. A derivative of this is jumping into a long dewdrop without a break. Virtually the end, you may run out of space for the caulk gun. A sudden terminate results and your carefully crafted bead becomes a mess. Piece of work from each edge to the middle, or first by caulking the terminal half dozen inches first. Exercise your best to keep pressure, speed and bending consistent.

Don't Forget the Final Step
The concluding common pitfall involves finish. So, you laid the most even, beautiful bead out of the tube. Looks groovy, you must be washed, right? Wrong. Don't miss the final critical stride in the procedure: Tooling. Don't go fooled by terminology here. Almost of the fourth dimension, the only additional caulking tools required are a fingertip, some water to dip it in and some paper towels. Smoothing the bead with light, steady pressure from your fingertip (or an ice cube or the dorsum of a metal spoon for exterior caulk) does ii things—it forces the caulk firmly confronting both surfaces and creates a clean, tidy appearance.
Source: https://www.familyhandyman.com/article/common-caulking-mistakes/
Posted by: ramirezblaideselly.blogspot.com
0 Response to "How To Use A Caulking Gun Youtube"
Post a Comment